How to make a MySQL Database in HyperPanel
An easy-to-follow tutorial on creating a MySQL database within our panel, detailing each step from accessing the databases section to successfully generating database credentials.

Introduction
This guide provides step-by-step instructions on how to create a new MySQL database within our panel. The process is straightforward and designed for easy database management, offering flexibility in connection settings.
Step 1: Access the Databases Section
Log in to the panel and locate the 'Databases' button on the sidebar. This section is where you can manage all your database needs.

Step 2: Create a New Database
In the Databases section, click on the 'New Database' button. This will open a form where you can enter the details for your new database.

Step 3: Enter Database Details
In the provided form, enter a 'DATABASE NAME'. Then, specify 'CONNECTIONS FROM' to determine where connections should be allowed from. Leave this field blank to allow connections from anywhere.
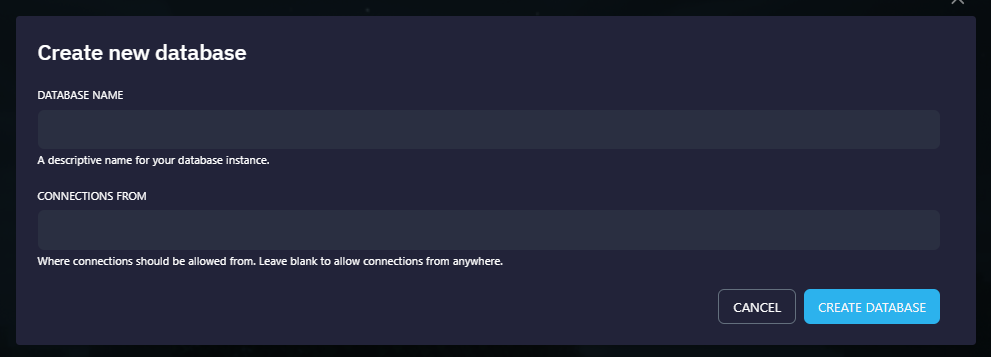
Step 4: Create Your Database
After filling in the details, click on the 'CREATE DATABASE' button. Your new database will be created, and you'll be provided with the necessary credentials for accessing it.

Conclusion
You've successfully created a MySQL database! You should now have all the credentials needed for your database. Ensure to keep these credentials secure.
Troubleshooting and Support
If you encounter any issues or have questions, feel free to join the Hybrid Hosting Discord server and open a ticket. Our dedicated support staff will be glad to assist you.
Products
Information
About Hybrid Hosting